
Exploring the Best Armored Core Model Kits: A Collector’s Guide
Introduction
Giant mechanized mechs with menacing weapons and booster rockets on their backs clash in epic battles. Though it may sound like a scene from a science fiction movie, it’s the world depicted in the popular Armored Core video game franchise. Armoured Cores, or ACs for short, are the centrepiece – featuring centurion-like robots engaged in mech combat across dystopian futures. Armored Core model kits offer enthusiasts an immersive experience in building intricate mechs.
As a long-time fan of the games, I’ve always wanted to own a finely detailed Armored Core model up close. Now, actual model kits allow you to build and pose your favourite ACs from the series right on your shelf!

Explore the possibilities of customization with Armored Core model kits, allowing for unique creations limited only by imagination.
With their complex mechanical designs, posable joints, and customizable parts, AC model kits offer an exciting hands-on experience. But getting started can be overwhelming for beginners in the hobby. In this blog post, I’ll guide you through everything you need to know – from choosing your first kit to advanced painting and posing techniques.
Whether you want to decorate your gaming room with an impressive figure or relive childhood memories of the classic video game through modelling, Armored Core kits present rewarding creative opportunities. So power up your AC, and let’s assemble these awesome mechs! Dive into the world of mecha with Armored Core model kits, each piece a testament to precision engineering.
Getting Started with Armored Core Model Kits
Starting with Armored Core (AC) model kits may be an enjoyable and fulfilling pastime, particularly for those who enjoy the well-known mech video game franchise. Though the assembly process may initially seem intimidating, I’ll guide you through everything you need to know to build your epic Armored Core model.
The most important first step is making sure you have the proper tools and supplies:
| Supply | Purpose |
| Nipper | To cut plastic parts off the runners |
| Craft knife | Trimming and removal of excess plastic |
| Sandpaper | Smoothing rough edges on plastic parts |
| Plastic cement | To firmly join pieces together |
| Acrylic paints | For custom colouring and detailing |
| Paint brushes | Multiple sizes for flexibility |
| Panel liners | To create depth details |
I recommend getting a basic tool kit designed specifically for model kits – it will come with essential nippers, an X-Acto knife, files, and basic glue to get you started.
Next, you’ll want to consider your skill level. AC model kits range from beginner snap-fit sets up to intricate sculptures better suited for experts:
Entry Level Kits
- Easy Snapfit construction
- Pre-colored plastic parts
- No glue or paint is required
- Great way to test the hobby
Intermediate Kits
- Require cement glue for assembly
- Need to be hand-painted
- Some modifications possible
Advanced Kits
- High part counts – over 200+ pieces
- Demand seam line removal
- Scribing and complex posing
As a beginner, stick to snap-fit sets to familiarize yourself without getting overwhelmed. Over time, you can progress to cementing, painting, panel lines, decals, lighting effects, and even scratch building!
To recap – stock up on essential model making tools, evaluate your current experience level, then browse for the right AC kit to start building your Armored Core universe! Construct your own battle-ready machines with Armored Core model kits, fostering creativity and skill development.
Selecting Your First Armored Core Model Kits
Now that you’re set up with all the necessary tools and materials for Armored Core model building, the exciting part comes in choosing your very first kit! With iconic mechs like White Glint, Nine Ball, and Hanged Man, deciding which to start with among the array of possibilities can be tough. Immerse yourself in the detailed craftsmanship of Armored Core model kits, bringing iconic mechs to life.
As you browse options, first consider complexity factors:
Number of Parts
- Entry level: less than 100 pieces
- Intermediate: 100-200 pieces
- Advanced kits: 200-500+ pieces
Look for lower piece counts around 100 while getting acquainted with the hobby’s basics.
Instructions Difficulty
- Look for clearly illustrated step-by-step visual guides
- Avoid confusing diagrams early on
Design Intricacy
- Simpler armour shapes are easier to assemble over complex geometries
- Intricate details like vents/tubing add complexity
It’s also crucial you select an AC model you feel a connection with, whether it’s fond childhood memories of playing the games or purely aesthetic appeal. Armored Core model kits provide a hands-on exploration of futuristic technology and design. Below are quick refreshers on some of the most storied ACs:
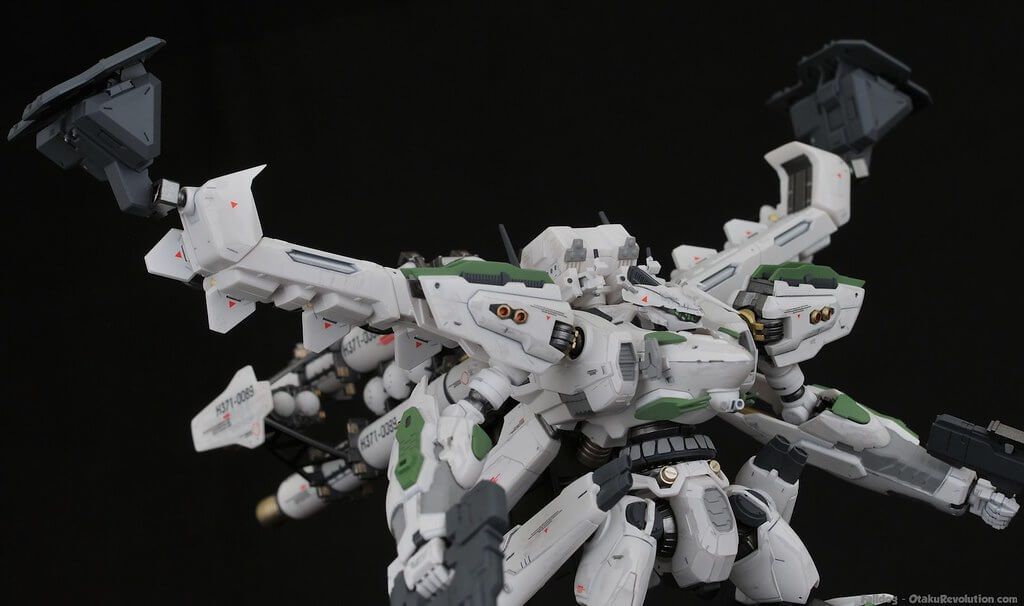
White Glint
- Cover mech of Armored Core 4
- Distinct bulky white chassis with red accents
- Great pick for AC4 fans
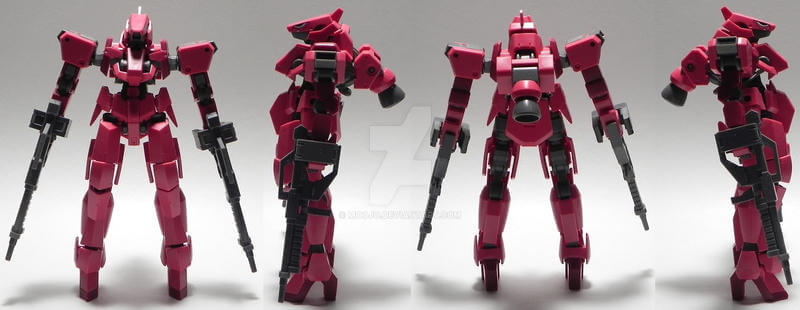
Nine Ball
- Recurring rival mech throughout the series
- Lean black armour with green sensor eye
- Iconic sinister design
Hanged Man
- Player 2 mech in iconic Armored Core: Master of Arena
- Menacing horned silhouette
- Nostalgic pick for PS1 generation fans
To summarize key aspects when choosing your starter AC model kit: evaluate complexity factors like part counts, instruction difficulty, and design intricacies before selecting a kit with personal significance from the franchise lore.
This gives you a clear sense of which criteria matter most when picking out that exciting first Armored Core model kit!
Building Armored Core model kits allows hobbyists to recreate their favorite mechanized units with meticulous detail.
Tips and Tricks Armored Core Model Kits for Assembly
You’ve selected the perfect first Armored Core model kit – White Glint, Nine Ball Seraph, or whichever iconic mech is special to you. The box art displays a masterfully posed render you can’t wait to recreate. However, you must assemble your AC properly before you can set it into a battle-ready stance!
Armoured Core kits involve more precision and finesse than typical snap-together model sets. Getting those intricate mech parts cleanly joined while avoiding disasters like cracks or ugly seam lines takes patience. Armored Core model kits offer enthusiasts an immersive experience into the intricate world of mecha design. Through trial and error, I’ve discovered some key model-making insights for smooth AC assembly:
Master Proper Nipper Technique
- Don’t press too hard and stress plastic
- Multiple passes from different angles
Take Your Time Removing Pieces from Runners
- Rushing leads to messy nubs left on parts
- Carefully shave down connections for a clean finish
Trim Obvious Seam Lines BEFORE Cementing
- Some slight seam lines are unavoidable
- But trim down major ones for optimal fit
Cement Application Tips
I only need a tiny amount – don’t blob glue!
- Alternate glue points on both pieces
- Allow 10-15 mins in position to cure
Let Sections Fully Cure Before Continuing
- Build in sections – torso, limbs etc
- Moving parts too soon can undo cement bonds
Remember – fight the urge to rush! Patience truly pays off for smoothly assembled joints without messy cracks or gaps.
Making mistakes while getting the hang of assembly techniques is part of the learning progression. So take it step-by-step, follow kit instructions closely, and don’t get frustrated. With practice, you’ll be flawlessly snapping together ACs in no time!
Delve into the realm of futuristic warfare with Armored Core model kits, featuring customizable weaponry and sleek designs. Armored Core model kits provide a hands-on opportunity to explore the technological marvels of fictional robotic combat.
Painting Tips
Once your Armored Core model kit is fully assembled, the fun continues with getting to detail and customize the mech through painting! This is where you can truly make it your AC. Constructing Armored Core model kits enables enthusiasts to bring to life the awe-inspiring machines from the acclaimed video game series.
While beginner snap kits have pre-decorated colour schemes, painting unlocks new levels of custom finishes. Weathering effects, metallic sheens, custom logos, and more open up tremendous creative possibilities.
Here’s an overview of vital steps in the AC painting process:
Prime Surfaces First
- Priming allows the paint to adhere better
- Spray can primers are easiest for full coverage
Use Quality Acrylic Model Paints
- Formulated specifically for plastics
- Thinner consistency than standard acrylics
- Enable blending, layering, mixing etc
Attempt Basic Brush Painting First
- Get used to controlling bristles before airbrushing
- Practice consistency in strokes
Start Simple with Primary Color Layer
- Focus only on the base colour coat first
- Once comfortable, attempt more advanced techniques
Consider Panel Line Washes
- Black/brown lining flows into crevices
- Creates a nice depth effect
Protect Finishes with Clear Top Coats
- Seal in acrylic paints
- Matte, gloss, or satin finishes
If you are properly prime, use purpose-built model paints, allow sufficient drying times between layers, and top coat for protection – you can let imagination run wild with Armored Core paint jobs!
Posing and Displaying the Finished Model
After all that assembly and painting effort, it’s time to make your Armored Core model shine by artfully posing and displaying it! Considering creative stance options and presentation styles makes all your meticulous mech-building work worthwhile.
First, think about what type of dynamic pose would suit your specific AC design:
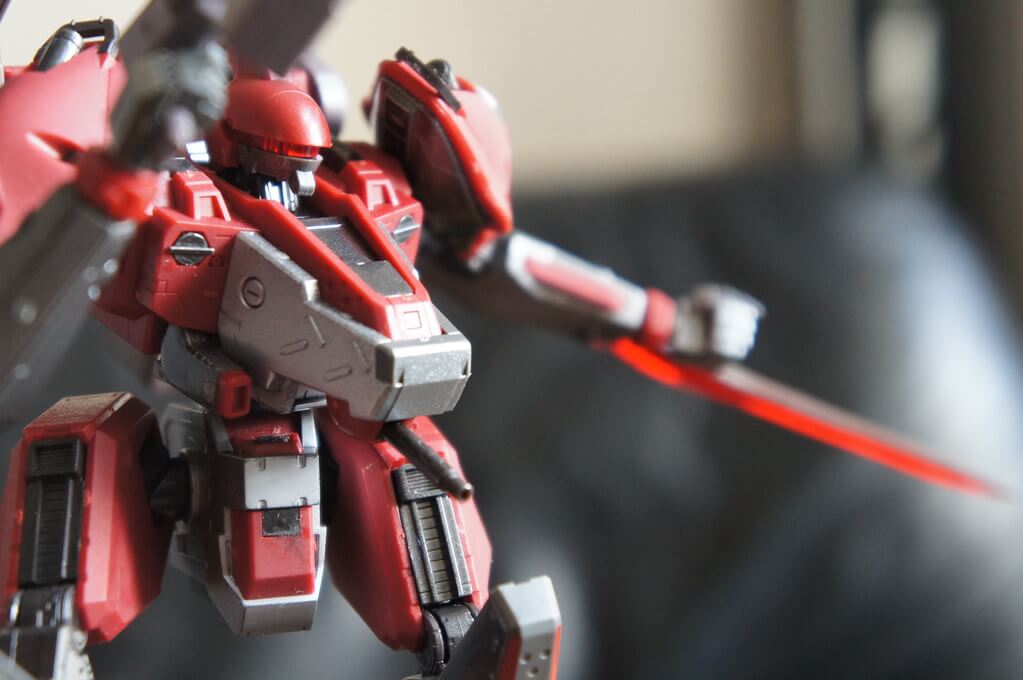
Action Poses:
- Leaping through the air, weapons drawn
- Caught mid-combat with another mech
- Moving poses require sturdy stands
Flying Poses:
- Activate flight boosters for aerial attacks
- Angle wings and limb positions appropriately
- Elevate on clear acrylic rods for a floating look
Stoic Heroic Poses:
- Tall, proud stances like on box art
- Subtle neck and wrist tilts
- Avoid flat static bores
Also, mix up possibilities by displaying in creative scenes:
- Urban warzones with crumbling buildings
- Futuristic hanger bays
- Lunar landscapes
Don’t forget to accessorize with pilot figures, power cores, spare parts, and weapons packs to embed your AC in its universe!
Getting the right pose captured through carefully adjusting hips, shoulders, and movable joints takes finesse. Use angled stands carefully to achieve that perfect stability. After all that patient construction and painting effort, displaying your mech in an artful scene makes enjoying the completed masterpiece worth it!
Where To Buy Armored Core Model Kits
Once you’re hooked on the creative possibilities of building and customizing your Armored Core models, you’ll want to know the best places to buy additional kits! Here are the top recommended retailers for AC models and supplies:
Online Shops
- HobbyLink Japan – Largest online mecha model selection
- Hobby Search – Also wide AC & accessories ranges
- Amazon – Occasional kit listings
Local Hobby Shops
- Specialty model and anime stores
- Call around for Armored Core inventory
- Support local businesses!
When ordering online, packages from Japan can take 2-3 weeks to arrive. So, plan for your next project!
Many new AC releases drop at the annual Wonder Festival event, so search for convention exclusives. Limited editions sell out quickly, so bookmark retailer listings.
And if you can’t find a specific kit, don’t hesitate to request reprints of your desired mech directly to manufacturers like Kotobukiya via social media!
Conclusion: Armored Core Model Kits
As we close out this extensive guide on assembling and customizing Armored Core model kits, I hope you’ve come away inspired by this hobby’s creative possibilities. Everything from reliving childhood mech gaming memories to expressing your artistic side is wrapped up in the AC modelling experience.
For Nostalgic Gamers
Recreating those epic sorties against Nine Ball Seraph or holding the controller as White Glint was revealed as the cover star of Armored Core 4 – those moments stick with us. Now, you can memorialize legendary powered armour designs that defined the tactical mech combat genre through intricate scale models. Display White Glint beside your game collection and smile, remembering bygone days dominating the battlefield.
For Artists Seeking an Outlet
The modelling process – choosing the right kit, assembly, sculpting materials, and meticulous hand painting – awakens your inner artist. With endless customization combos between armour parts swapping, original camo schemes, battle damage, diorama backdrops, and pose adjusting – no two builds ever have to look the same. You’ll shock even yourself discovering artistic talents you never knew you had.
For Collectors and Franchise Fans
Obtain an up-close tangible replica of renowned Armored Core universe entries like the ominous Hanged Man or Nine Ball’s edgy Seraph variant. Building a display shelf lined with iconic video game mechs presents rewards, whether you keep them boxed up or open them to admire the engineering.
For Those Wanting a Focused Distraction
We all have stress and could use healthy escapes from anxious thoughts. Losing yourself in the hyper-focused process of precision plastic assembly, delicate paint mixing, and balancing on stands for staging is tremendously cathartic. The sense of “flow” while hobby modelling eliminates outside worries – if only for a little while.
So whether longing to recapture childhood, needing an artistic channel, wanting iconic franchise memorabilia, or simply seeking productive distraction – now you know Armored Core model kits check every box. Please use this guide to grab starter supplies and dive hands-on into the AC modelling multiverse. Your custom mech awaits, pilot!