
Best Picture Hanging Kit: A Comprehensive Guide
Introduction
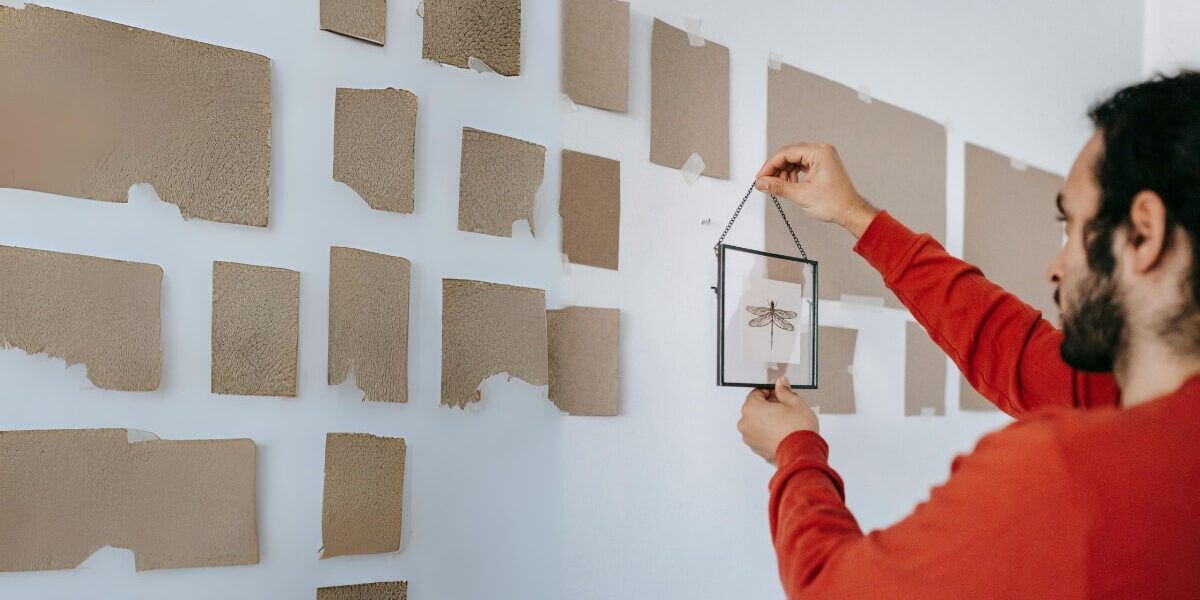
Have you ever stared at a blank wall, longing to dress it up with beautiful artwork or photographs, but felt intimidated by the prospect of hammering nails into it? Or perhaps you’ve attempted to hang a picture, only to have it come crashing down, leaving unsightly holes and dents behind. Fear not, for a simple solution will make your picture hanging kit woes a thing of the past: the picture hanging kit.
These unassuming hardware sets may seem insignificant, but they are the unsung heroes of interior decorating. With the fitting picture hanging kit, you can transform any bare wall into a stunning gallery that showcases your unique style and cherished memories. No more guesswork, no more disappointments – just a tried-and-true method for producing a unified and eye-catching display that will improve the appearance and feel of any space.
In this comprehensive guide, we’ll delve into the world of picture hanging kits, exploring their various components, types, and applications. We’ll equip you with the knowledge and techniques to confidently select and use the perfect kit for your needs, ensuring that your artwork remains securely mounted and perfectly level, no matter the wall material or frame size.
So, whether you’re an avid art collector, a proud parent displaying your child’s masterpieces, or simply someone who appreciates the transformative power of well-hung decor, this guide will become your trusted companion. Prepare to bid farewell to unsightly nail holes and crooked frames and embrace a new era of effortless picture hanging kit mastery.
What is a Picture Hanging Kit?
At first glance, a picture hanging kit may seem like a simple collection of nails, hooks, and wire – nothing too extraordinary. However, these unassuming bundles of hardware are the unsung heroes of interior decorating, designed to make your life exponentially easier when hanging artwork, mirrors, or photographs on your walls. But what exactly constitutes a picture hanging kit, and why should you consider using one? Let’s dive in and explore the magic behind these essential tools.
A picture hanging kit is a comprehensive set of components that work harmoniously to ensure your framed pieces are securely mounted and perfectly level every single time. While the specific contents may vary slightly between brands and kits, most will include a combination of the following elements:
Wall Anchors and Screws
- Drywall anchors: Designed for use in drywall, these anchors expand once inserted, creating a secure grip for your screws or nails.
- Molly bolts: An anchor used in drywall, plaster, or even concrete walls, providing superior holding power.
- Toggle bolts: Similar to molly bolts, toggle bolts are ideal for hanging heavy objects on hollow walls or ceilings.
- Screws: Included to accommodate different wall materials, such as drywall, plaster, or masonry.
Hanging Wires and Cords
- Picture hanging wire: A robust and flexible wire that attaches to the back of your Frame, allowing it to hang flush against the wall.
- Vinyl-coated picture hanging wire: Similar to regular hanging wire, but with a vinyl coating that prevents scratching or damage to your frames.
- Beaded picture hanging cords: A decorative alternative to wires, these cords add a touch of style while securely supporting your artwork.
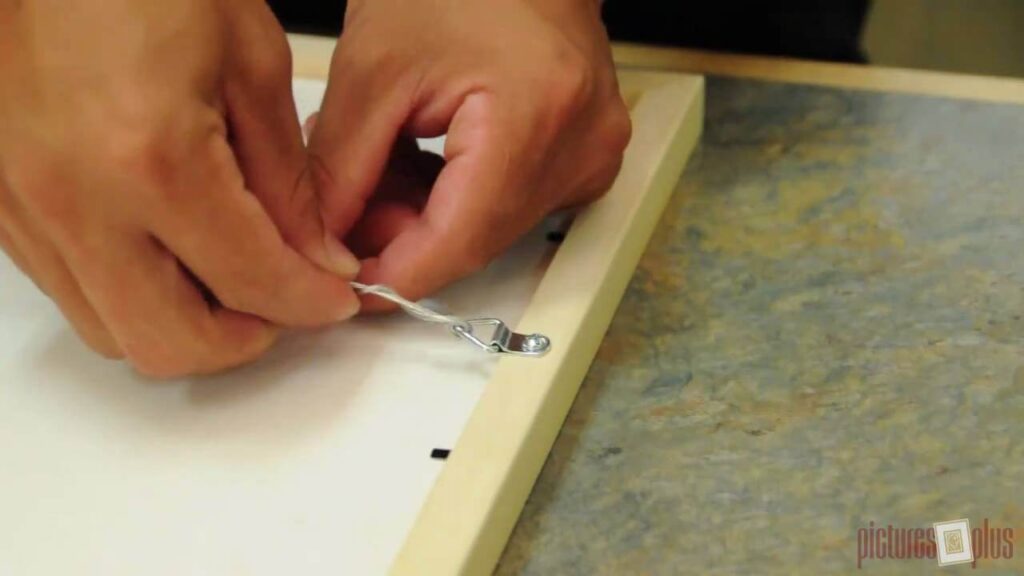
Hanging Hooks and Nails
- Sawtooth hangers: Small metal hangers that attach to the back of your Frame, designed to hang on a single nail or hook.
- D-ring hangers: Metal rings that screw into the back of your Frame, providing a secure attachment point for hanging wires or cords.
- Wall hooks and nails: An assortment of hooks, brads, and finish nails to accommodate different hanging styles and wall materials.
One of the key advantages of using a picture hanging kit is the peace of mind that comes with knowing your artwork is securely mounted. These kits are designed to support various frame sizes and weights, taking the guesswork out of selecting the appropriate hardware. With the fitting kit, you can confidently hang even the heaviest or most precious pieces without worrying about them crashing to the ground.
But the benefits continue beyond there. Picture hanging kits also offer a versatility that’s hard to match. Whether working with drywall, plaster, brick, or concrete walls, these kits have you covered with the appropriate anchors and fasteners. With options like sawtooth hangers, D-rings, and adjustable wire lengths, you can achieve the perfect hanging style – flush against the wall, tilted at an angle, or even create a sleek gallery wall display.
In the following sections, we’ll dive deeper into the different types of picture hanging kits available and provide step-by-step instructions on using them effectively. But for now, rest assured that with these trusty kits in your arsenal, the days of unsightly nail holes, crooked frames, and precarious hanging methods will be a thing of the past.
Types of Picture Hanging Kits: Finding the Perfect Fit
Regarding picture hanging kits, one size only fits some. Just as every artwork is unique, so are the requirements for securely and stylishly displaying them. Whether you’re dealing with lightweight canvas prints or heavy gilded frames, drywall or solid masonry, a flush mount, or gallery-style arrangement, there’s a specific kit tailored to your needs. Let’s explore the different types of picture hanging kits available so you can find the perfect match for your project.
Wall Anchors and Screws
At the foundation of any good picture hanging kit is the wall anchors and screws. These unassuming components are the backbone of your hanging system, providing a secure grip and solid support for your artwork. Here are some of the most common types you’ll encounter:
- Drywall anchors: Explicitly designed for drywall, these anchors expand once inserted, creating a tight grip within the wall material. They come in various sizes to accommodate different screw gauges and weight capacities.
- Molly bolts: A versatile anchor used in drywall, plaster, or even concrete walls. Molly bolts feature a threaded cylinder that grips the wall material from the inside, providing superior holding power to traditional anchors.
- Toggle bolts: Similar to molly bolts, toggle bolts are ideal for hanging heavy objects on hollow walls or ceilings. They consist of a bolt with spring-loaded wings that open up and grip the back of the wall once inserted.
- Screws: No anchor is complete without the suitable screws. Picture hanging kits typically include an assortment of screws designed for different wall materials, such as drywall, plaster, or masonry.
| Anchor Type | Ideal Wall Material | Weight Capacity | Ease of Installation |
| Drywall Anchor | Drywall | Light to Medium | Easy |
| Molly Bolt | Drywall, Plaster, Concrete | Medium to Heavy | Moderate |
| Toggle Bolt | Hollow Walls, Ceilings | Heavy | Moderate to Difficult |
Hanging Wires and Cords
Once you’ve secured your anchors, it’s time to consider the hanging wires and cords that will support your framed masterpieces. These components provide the physical connection between your artwork and the wall and can also contribute to the overall aesthetic of your display.
- Picture hanging wire: A tried-and-true classic, picture hanging wire is a robust and flexible strand that attaches to the back of your Frame, allowing it to hang flush against the wall. It’s available in various gauges to accommodate different frame weights and sizes.
- Vinyl-coated picture hanging wire: Similar to regular hanging wire, but with a vinyl coating that prevents scratching or damage to your frames, especially those with delicate finishes or intricate details.
- Beaded picture hanging cords: For those seeking elegance, beaded picture hanging cords offer a decorative alternative to traditional wires. These cords securely support your artwork and complement your decor with their stylish beaded design.
Hanging Hooks and Nails
While anchors and wires are essential, you’ll also need a way to securely connect your artwork to the wall. Enter hanging hooks and nails – the final pieces of the picture hanging kit puzzle.
- Sawtooth hangers: These small metal hangers attach to the back of your Frame and are designed to hang on a single nail or hook, making them perfect for lightweight pieces or temporary displays.
- D-ring hangers: Sturdier than sawtooth hangers, D-ring hangers screw directly into the back of your Frame, providing a secure attachment point for hanging wires or cords. They’re ideal for heavier frames or permanent installations.
- Wall hooks and nails: A picture hanging kit would only be complete with an assortment of hooks, brads, and finish nails. These versatile fasteners accommodate different hanging styles and wall materials, allowing you to create a perfectly level and secure display.
Rail Systems and Tracks

Rail systems and tracks offer a sleek and adjustable solution for those seeking a more modern and flexible approach to picture hanging.
- Picture rail systems: Consisting of a horizontal rail mounted to the wall, picture rail systems allow you to easily slide hooks or hangers along the length of the rail, making it simple to rearrange your artwork or add new pieces.
- Sliding track hangers: Similar to rail systems, sliding track hangers feature a track that mounts to the wall, with hangers that can be positioned and locked into place along the length of the track.
With so many options available, it’s crucial to carefully consider the weight of your frames, the wall material you’re working with, and the desired hanging style before selecting a picture hanging kit. Don’t worry; we’ll guide you through choosing the fitting kit for your needs in the next section.
Choosing the Right Picture Hanging Kit
It can be confusing to choose the picture hanging kit that best fits your needs out of all the possibilities available. But, by taking into account a few crucial elements, you may focus your options and guarantee a safe and eye-catching installation.
1. Wall Material: The type of wall you’re working with is arguably the most important consideration when selecting a picture hanging kit. Drywall, plaster, brick, and concrete require different anchors and fasteners for proper support.
- For drywall, lightweight drywall anchors or molly bolts are typically sufficient.
- Plaster walls may require larger molly bolts or toggle bolts.
- Brick and concrete walls will require masonry screws or heavy-duty anchors designed for solid materials.
2. Weight of Artwork/Frame: The combined weight of your artwork and Frame will determine the strength and load capacity required from your picture hanging kit. Heavier pieces will demand sturdier anchors, thicker hanging wires, and potentially additional support mechanisms.
3. Frame Type and Hanging Hardware: Examine the back of your Frame to identify the existing hanging hardware or attachment points. Some frames come pre-installed with sawtooth hangers or D-rings, which may influence the type of hanging wire or cord you need.
4. Desired Hanging Style: Consider whether you want your artwork hung flush against the wall, tilted at an angle, or as part of a gallery-style arrangement. Certain kits are better suited for specific hanging styles, such as sliding track systems for gallery walls.
Once you’ve assessed these factors, you can begin narrowing down your picture-hanging kit options. For example, if you’re hanging a large, heavy canvas on a drywall, you might opt for a kit with molly bolts, heavy-gauge hanging wire, and D-ring hangers. Conversely, a kit with toggle bolts and a beaded hanging cord could be the perfect choice for a lightweight frame on a plaster wall.
Step-by-Step Guide to Using a Picture Hanging Kit
With the selected picture hanging kit, it’s time to get to work. To guarantee a seamless and effective installation, adhere to following detailed instructions:
1. Prepare the Wall: Start by cleaning and inspecting the wall area where you plan to hang your artwork. Remove any existing nails or hardware, and repair any holes or damage to the surface.
2. Measure and Mark: Carefully measure and mark the desired hanging location, considering the size of your Frame and the desired height and positioning. Use a level to ensure your markings are straight.
3. Install Wall Anchors (if needed): If your kit includes wall anchors, carefully follow the installation instructions at the marked locations. Different anchor types may require specific installation techniques, such as drilling pilot holes or using a hammer to set them in place.
4. Attach Hanging Hardware to the Frame: Next, secure the appropriate hanging hardware (e.g., sawtooth hangers, D-rings) to the back of your Frame if not already installed. Consult the kit’s instructions or the frame manufacturer’s recommendations for proper placement and attachment methods.
5. Hang the Picture: With the wall anchors and frame hardware in place, it’s time to hang your artwork. If using hanging wire or cord, thread it through the appropriate hardware on the back of the Frame and secure it to the wall anchors or hooks. Place sawtooth hangers over the protruding nail or hook on the wall.
6. Adjust and Level: Once your artwork is hung, step back and examine its positioning and level. Use a level tool or the age-old trick of holding a pencil at arm’s length to ensure your piece is straight. Adjust the hanging hardware or anchors until you achieve the desired result.
Picture Hanging Kit: Tips and Tricks
Even with the correct picture hanging kit and proper installation techniques, there are a few additional tips and tricks that can elevate your hanging experience:
- Choose the Right Anchors for Your Wall Material: Selecting the appropriate anchors based on the type of wall you have is essential to ensure a sturdy and safe installation. Don’t be tempted to use drywall anchors on plaster or brick walls – opt for the appropriate heavy-duty anchors instead.
- Dealing with Studs and Solid Walls: If you encounter a stud or solid wall surface while installing anchors, you may need to use specialized masonry screws or toggle bolts designed for these materials. Alternatively, you can strategically plan your hanging locations to avoid studs altogether.
- Hanging Multiple Pictures in a Gallery Wall: Consider using a sliding track system or picture rail kit for a cohesive gallery wall display. These allow you to easily adjust and rearrange your artwork without repeatedly putting new holes in the wall.
- Using a Laser Level or Other Leveling Tools: While the tried-and-true pencil method can work for leveling, investing in a laser level or other tool can significantly simplify the process, especially for larger or multiple pieces.
- Securing Hanging Wires and Preventing Sagging: To prevent your artwork from sagging over time, periodically check and tighten the hanging wires or cords. You can also use wire tensioners or crimps to secure the wire and maintain a taught, level hanging.
Maintenance and Safety
Once your artwork is hung, it’s essential to take steps to ensure its continued safety and longevity. Here are some maintenance and safety tips to keep in mind:
- Periodic Inspections and Tightening: Regularly inspect your hanging hardware, anchors, and wires for any signs of loosening or wear. Tighten or replace components as needed to maintain a secure installation.
- Removing and Re-hanging Pictures Safely: When it’s time to rearrange or remove your artwork, properly unhook or unscrew the hanging hardware from the wall anchors. It is not advisable to only tug or pull on the Frame since this could break the wall or make the piece fall.
- Childproofing and Securing Picture Hangings: If you have young children or pets in your home, consider adding extra security measures to your picture hangings. This could include using security hardware, such as locking hooks or wire tensioners, or strategically positioning artwork out of reach.
By following these maintenance and safety guidelines, you can enjoy your beautifully hung artwork with peace of mind, knowing it’s securely and safely displayed for years.
Where to Buy Picture Hanging Kits
Now that you have the knowledge and expertise to select and use the perfect picture-hanging kit, you may wonder where to find these invaluable tools. Fortunately, there are several convenient options to suit various preferences and budgets.
1. Online Retailers: The internet has made purchasing picture hanging kits from the comfort of your home more accessible than ever. Major online marketplaces like Amazon, Walmart, and home improvement retailer websites offer a wide selection of kits from various brands at different prices.
Pros:
- Convenience of shopping from anywhere
- The capacity to compare products and read customer reviews
- Often competitive pricing and frequent sales/discounts
Cons:
- Shipping costs and delivery times may vary
- Inability to physically inspect the products before purchasing
2. Hardware Stores: Your local hardware store or home improvement center will likely carry a decent assortment of picture-hanging kits. Major chains like The Home Depot, Lowe’s, and Ace Hardware typically have a dedicated aisle or section for picture-hanging supplies.
Pros:
- Possibility of viewing and handling the goods before purchasing
- Knowledgeable staff who can provide recommendations
- Convenient for making spontaneous purchases
Cons:
- There can be fewer options available than with internet merchants
- Prices may be higher than online options
3. Art Supply Stores: Art supply stores can be an excellent resource for those seeking specialized or higher-end picture-hanging solutions. Retailers like Blick Art Materials, Michaels, and local framing shops often carry a curated selection of premium kits tailored for artwork and gallery installations.
Pros:
- Access to professional-grade and specialized kits
- Staff with expertise in art hanging and framing
- Ability to purchase other art supplies on the same trip
Cons:
- Limited selection of basic or budget-friendly kits
- Typically higher price points due to specialty products
4. Specialty Picture Framing Shops: If you have a local picture framing shop or gallery in your area, they may offer their proprietary picture hanging kits or recommend specific products they trust and use for their installations.
Pros:
- Expert advice from professionals in the framing industry
- Access to high-quality, commercial-grade kits
- Potential for custom solutions tailored to your needs
Cons:
- Limited selection and higher prices due to specialty offerings
- May need to visit the shop in person for purchases
Regardless of where you purchase your picture hanging kit, compare products, read reviews, and consider factors such as the weight capacity, wall material compatibility, and included components. Be bold and ask questions or seek recommendations from knowledgeable staff to ensure you’re getting the fitting kit for your specific needs.
Conclusion: Picture Hanging Kit
As we’ve explored throughout this comprehensive guide, picture hanging kits are the unsung heroes of interior decorating, transforming blank walls into stunning galleries and bringing cherished artwork to life. By understanding the various components, types, and installation techniques, you’ve armed yourself with the knowledge and skills to confidently and securely hang your framed pieces, regardless of size, weight, or wall material.
Whether you’re an avid art collector, a proud parent showcasing your child’s creations, or simply someone who appreciates the transformative power of well-hung decor, a picture-hanging kit is an essential tool in your arsenal. No more unsightly nail holes, crooked frames, or precarious hanging methods – with the fitting kit and guidance, you can achieve a professional-looking display that perfectly complements your unique style and space.
Don’t be afraid to invest in quality anchors, hanging wires, and leveling tools – these small upfront costs will pay dividends in the form of a secure and long-lasting installation.
Most importantly, embrace the joy and creativity of curating your own gallery. Experiment with different hanging styles, mix and match frames, and let your walls tell the story of your life and passions. With the fitting picture hanging kit by your side, the possibilities are endless.
So, approach the task with confidence and enthusiasm, whether you’re embarking on your first art hanging adventure or simply looking to revamp your existing displays. Unleash your inner decorator, and let your walls become the canvas upon which your style and memories come to life.